Gutter guards are supposed to be the set-it-and-forget-it solution to clogged gutters. But here’s the reality: even the best guards collect debris over time. Pine needles wedge into mesh screens, shingle grit builds up on reverse-curve systems, and organic material breaks down into sludge that blocks water flow. Ignoring this maintenance can lead to ice dams, foundation damage, and fascia rot, expensive problems that defeat the entire purpose of installing guards in the first place. The good news? Cleaning gutter guards is simpler than cleaning open gutters, but it requires a different approach depending on the type you have installed.
Table of Contents
ToggleKey Takeaways
- Gutter guard cleaning requires inspection twice yearly—in late spring and late fall—to prevent water overflow, ice dams, and foundation damage despite the guards’ set-it-and-forget-it reputation.
- Different gutter guard types require specific cleaning approaches: micro-mesh guards need soft-brush scrubbing, reverse-curve systems require damp-cloth wiping, and foam inserts should be removed annually for thorough cleaning.
- Water spilling over gutter edges, sagging gutters, plant growth, and siding stains are critical signs that gutter guard cleaning is needed to prevent costly structural repairs.
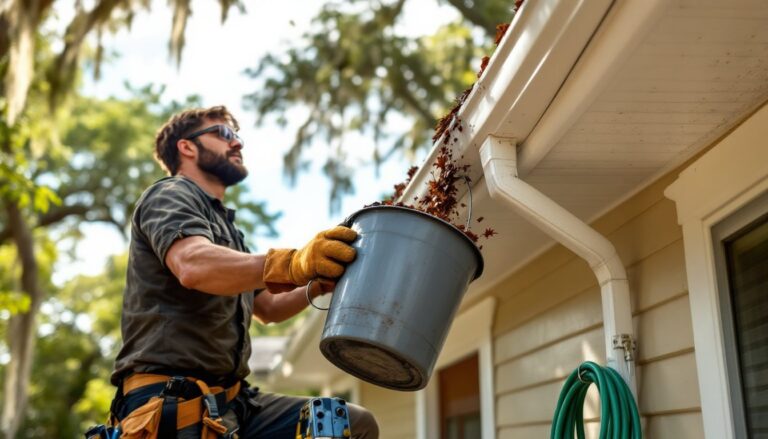
- Always use proper safety equipment including a stabilizer-bar ladder, work gloves, and safety glasses; never walk on the roof or use high-pressure washers that can damage guards and force water under shingles.
- Every 2–3 years, remove gutter guards and flush the underlying trough to clear sediment and shingle grit that accumulate even with guards in place, which is especially important for homes with asphalt shingles.
- Choosing the right gutter guard type for your environment—such as micro-mesh for pine needles or perforated screens for general debris—minimizes maintenance frequency and extends the system’s effectiveness.
Why Gutter Guards Still Need Regular Cleaning
Gutter guards reduce the volume of debris entering the gutter trough, but they don’t eliminate maintenance. The surface of the guard itself becomes a collection point.
Mesh and perforated guards trap fine debris like pine needles, seed pods, and decomposing leaves on top. Over time, this layer becomes thick enough to shed water over the edge instead of through the perforations. Reverse-curve (surface tension) guards rely on water adhesion to pull moisture around a curved lip while debris falls off. When shingle grit, pollen, and dirt accumulate on that curve, surface tension fails and water overshoots the trough.
Foam and brush-style inserts absorb organic material, which decomposes inside the gutter. This creates a nutrient-rich environment for seedlings and mold. You’ll end up with small trees growing out of your gutters if left unchecked, yes, that actually happens.
Building codes don’t typically mandate gutter guard cleaning intervals, but manufacturers often recommend inspection twice a year: once in late spring after tree pollination and again in late fall after leaf drop. Homes under heavy tree canopy, especially oak, pine, or maple, may need quarterly attention. Skipping this schedule can void warranties on some premium guard systems.
Signs Your Gutter Guards Need Attention
Water spilling over the gutter edge during rain is the most obvious red flag. If you see sheets of water cascading off the front lip instead of draining through downspouts, debris has blocked either the guard surface or the underlying trough.
Sagging or pulling away from the fascia indicates weight buildup. Wet debris is surprisingly heavy, a 20-foot run of clogged gutter can hold 50+ pounds of saturated organic matter. This stress can loosen fasteners and warp aluminum gutters.
Plant growth emerging from the gutter line isn’t just unsightly: it’s a structural warning. Roots from seedlings can penetrate fascia boards and compromise the integrity of your roof edge. Regular maintenance practices help prevent this kind of damage before it requires costly repairs.
Staining on siding or fascia below the gutter indicates chronic overflow. Look for vertical dirt streaks, algae growth, or peeling paint. Inside the home, check the attic for water stains on rafters near the roof edge, a sign that water is backing up under shingles due to ice damming caused by clogged guards.
Essential Tools and Safety Equipment for the Job
Ladder safety comes first. Use a stabilizer bar (standoff bracket) to keep the ladder away from the gutter and distribute weight to the wall, not the gutter itself. An extension ladder rated for 250 lbs (Type I) or better is recommended. For single-story homes, a 24-foot ladder handles most situations: two-story homes need 32 feet or more.
Personal protective equipment (PPE) includes safety glasses or goggles to protect against debris falling into your eyes, work gloves with grip palms (nitrile-coated are ideal for wet conditions), and non-slip footwear. If you’re working near power lines or using a pressure washer, add hearing protection.
Cleaning tools vary by guard type:
- Soft-bristle brush (nylon or natural fiber) for scrubbing mesh and micro-mesh without damaging the screening
- Garden hose with spray nozzle for rinsing: a gutter cleaning wand attachment (curved tube, 3–4 feet long) lets you flush from above without leaning over
- Leaf blower for dry debris removal on solid-surface guards
- Plastic putty knife or gutter scoop for breaking up compacted material without scratching aluminum or vinyl
- Bucket with S-hook to hang from the ladder for debris collection
A pressure washer (1500–2000 PSI) can speed up the job but requires caution. Too much pressure can dent aluminum guards or force water behind the fascia. If using one, keep the nozzle 12+ inches away and use a 25- or 40-degree tip, never a zero-degree jet.
Step-by-Step Gutter Guard Cleaning Process
Start by inspecting the entire gutter system from the ground with binoculars if possible. Note areas with visible debris buildup, sagging, or plant growth. This helps you plan your ladder moves and estimate time.
1. Clear the guard surface. Remove large debris by hand or with a leaf blower. Work in sections, moving the ladder every 6–8 feet rather than overreaching. For mesh guards, brush debris toward the roof edge or downward, never push it toward the downspout opening, where it can clog the trough below.
2. Flush with water. Starting at the end opposite the downspout, rinse the guard surface with a garden hose. Watch how water flows. It should sheet evenly across the guard and into the trough. If water pools or runs off the edge, debris is trapped underneath or the guard is improperly pitched.
3. Check downspouts. Run water through each downspout for 30 seconds. If flow is weak or nonexistent, there’s a clog. A plumber’s snake or downspout auger can clear blockages. Tap the downspout with a rubber mallet to dislodge compacted debris.
4. Inspect fasteners and seams. Look for loose screws, separated sections, or gaps between the guard and the gutter lip. Micro-mesh systems often use clips that can pop loose in freeze-thaw cycles. Re-secure as needed with stainless steel screws (avoid galvanized, which rust and stain).
How to Clean Different Types of Gutter Guards
Micro-mesh guards (stainless steel or surgical-grade mesh) rarely need removal. Brush the surface with a soft-bristle brush and rinse. For stubborn shingle grit buildup, use a solution of 1 part white vinegar to 3 parts water. Let it sit for 5 minutes, then scrub and rinse. This also helps break down organic staining.
Reverse-curve (Gutter Helmet, LeafGuard-style) guards need the curved surface kept clean for surface tension to work. Wipe down the curve with a damp cloth or sponge. Don’t use abrasive pads, which can scratch the finish and create rough spots where debris catches. These systems are often professionally installed and may require removal for deep cleaning, check your warranty before attempting this yourself.
Perforated aluminum or vinyl screens are the easiest to maintain. Brush off debris, rinse, and you’re done. These guards are also the easiest to remove if you need to access the trough. Most snap or slide out from under the shingle edge.
Foam and brush inserts should be removed annually for cleaning. Pull them out (they’re friction-fit), shake or blow out debris, then rinse with a hose. If the foam is crumbling or the bristles are matted, replace them, they’re inexpensive and degrade in UV exposure. Let inserts dry completely before reinstalling to prevent mold growth.
For homes surrounded by heavy tree cover, the approaches outlined in DIY maintenance guides often recommend seasonal deep cleans rather than quarterly surface cleaning.
Common Mistakes to Avoid When Cleaning Gutter Guards
Walking on the roof to access gutters is risky and unnecessary. Ladder standoffs and extension wands let you work safely from the ladder. If your roof pitch exceeds 6:12 or you have a three-story home, hire a professional. The cost of a service call is far less than a hospital bill.
Using a pressure washer at full power can damage micro-mesh, blow off fasteners, or force water under shingles and into the roof deck. Always start at the lowest pressure setting and increase only if needed. Keep the nozzle angled downward, never upward toward the roof.
Ignoring the trough underneath is a critical oversight. Even with guards in place, fine sediment and shingle grit accumulate in the bottom of the gutter channel. Every 2–3 years, remove the guards (if possible) and flush the trough. This is especially important for homes with asphalt shingles, which shed granules continuously.
Forcing debris into downspouts to avoid dealing with it creates clogs that are harder to clear. Always pull debris upward and out, or push it to the ground for collection.
Skipping fall cleaning in mild climates is tempting, but decomposing organic material accelerates corrosion in aluminum gutters. Even if you don’t have freezing temperatures, the acidic breakdown of leaves can pit gutter surfaces over time.
Many homeowners reference trusted renovation resources for additional troubleshooting steps when tackling persistent gutter issues or deciding whether to upgrade their current system.
Conclusion
Gutter guards don’t eliminate maintenance, they change it from scooping muck out of troughs to keeping the guard surface clear. The payoff is fewer trips up the ladder and better long-term protection for your home’s foundation and siding. A twice-yearly inspection and cleaning cycle, adjusted for your tree cover, keeps the system working as designed. If you’re dealing with chronic clogs even though regular cleaning, it may be time to evaluate whether the guard type matches your environment. Some systems handle heavy leaf fall better: others excel with fine debris like pine needles. Match the tool to the task, and you’ll spend less time on the ladder.