Walking away from a lease means more than just packing boxes and forwarding mail. Landlords and property managers expect the unit to be returned in move-in condition, and security deposits hang in the balance. A half-hearted wipe-down won’t cut it. Move out deep cleaning requires tackling grime in places renters rarely notice during day-to-day living: baseboard scuffs, grout lines, appliance interiors, and window tracks. This guide breaks down exactly what needs scrubbing, which tools make the job faster, and the mistakes that cost tenants their deposits.
Table of Contents
ToggleKey Takeaways
- Move out deep cleaning restores a rental unit to move-in condition and protects your security deposit from landlord deductions for inadequate cleaning.
- Professional-level move out deep cleaning requires tackling often-missed areas like baseboards, grout lines, appliance interiors, and window tracks using the right tools and solutions.
- A systematic room-by-room approach—starting with the kitchen and bathrooms where grime is most visible—prevents missed spots and keeps the cleaning process manageable across 6–10 hours.
- Documenting your move out deep cleaning with photos and time-stamped images provides evidence against deposit withholding disputes and distinguishes normal wear from negligence.
- Avoid costly mistakes like skipping the move-in inspection report, using wrong cleaners on delicate surfaces, rushing the process, and overlooking overlooked areas like ceiling fans, light fixtures, and odor removal.
- Start deep cleaning 48–72 hours before move-out and expect to spend $50–$80 on supplies, which is far less than the $200–$500 cost of hiring professional cleaning crews.
What Is Move Out Deep Cleaning and Why Does It Matter?
Move out deep cleaning goes beyond routine housekeeping. It’s a top-to-bottom restoration of a rental unit to the condition documented in the move-in inspection report. That means addressing accumulated dust, grease, stains, and wear from months or years of occupancy.
Landlords typically hold security deposits as leverage to ensure tenants leave the property clean and undamaged. Most lease agreements include language requiring “professional-level cleaning” or specifying that failure to clean adequately results in deductions for hired cleaning crews. Those deductions aren’t cheap, professional move out cleaning services often charge $200–$500 for a standard two-bedroom apartment, depending on square footage and condition.
Deep cleaning also protects renters from disputes. Photographic evidence of a spotless unit, paired with receipts for cleaning supplies or services, provides documentation if a landlord attempts to withhold deposits for “excessive dirt” or “unusual wear.” According to standard rental practices, normal wear and tear, like faded paint or worn carpet fibers, shouldn’t trigger deductions, but grime and neglected maintenance can.
Timing matters. Most leases require the unit to be cleaned before the final walk-through, not after. Starting the process 48–72 hours before move-out allows time to address missed spots flagged during an initial self-inspection.
Essential Supplies and Tools for Move Out Cleaning
Gathering the right supplies upfront prevents mid-project trips to the hardware store. Move out cleaning demands heavier-duty products than weekly maintenance.
Cleaning Solutions:
- All-purpose cleaner for countertops, walls, and general surfaces
- Degreaser (alkaline-based) for kitchen buildup on stovetops, range hoods, and backsplashes
- Bathroom disinfectant with EPA-registered antimicrobial properties for toilets, tubs, and tile
- Glass cleaner (ammonia-free to avoid streaks on windows and mirrors)
- Vinegar solution (1:1 with water) for hard water stains and mineral deposits
- Baking soda as a non-abrasive scrub for sinks, tubs, and oven interiors
- TSP (trisodium phosphate) or TSP substitute for heavy wall cleaning (test on inconspicuous spots first, it can dull paint)
Tools and Equipment:
- Vacuum with attachments (crevice tool, upholstery brush) for baseboards, vents, and corners
- Microfiber cloths (at least a dozen, they trap dust better than cotton rags)
- Scrub brushes in multiple sizes: stiff-bristled for grout, soft for delicate surfaces
- Mop and bucket or a spray mop for hard floors
- Extension pole for ceiling fans, light fixtures, and high corners
- Razor scraper for removing adhesive residue, paint drips, or stuck-on grime from glass and tile
- Step ladder rated for your weight to safely reach upper cabinets and closet shelves
Safety Gear:
- Rubber gloves to protect hands from chemical cleaners
- Safety goggles when using spray degreasers or oven cleaners overhead
- Dust mask or N95 respirator if dealing with mold, heavy dust, or strong fumes
Buying in bulk at a home improvement center is more cost-effective than grabbing single bottles at a grocery store. Expect to spend $50–$80 on supplies for a thorough move out clean, but that’s still far less than hiring help.
Room-by-Room Deep Cleaning Checklist
Systematic room-by-room cleaning prevents missed spots and keeps the process manageable.
Kitchen and Appliance Deep Cleaning
Kitchens accumulate the most grime and draw the sharpest scrutiny during walk-throughs. Landlords often cite dirty ovens and refrigerators as top deposit deductions.
- Empty and wipe cabinets and drawers. Remove shelf liners, vacuum crumbs, and wipe interiors with all-purpose cleaner. Don’t forget the top surfaces of upper cabinets, dust settles there.
- Degrease the range and hood. Spray degreaser on stovetop grates, burner pans, and the underside of the range hood. Let it sit 10–15 minutes before scrubbing. For electric coil burners, lift them out and wipe the drip pans underneath. Gas burners may require disassembly, consult the appliance manual.
- Deep-clean the oven. Self-cleaning cycles work but can produce heavy smoke and odors: crack windows and disable smoke detectors temporarily (then re-enable). Alternatively, coat the interior with baking soda paste (3 parts soda, 1 part water), let it sit overnight, then scrub and rinse. The homeowner maintenance guides often recommend this method for avoiding harsh fumes.
- Scrub the refrigerator. Remove shelves and drawers: wash them in the sink with dish soap. Wipe the interior walls, door seals, and the drip tray underneath (it slides out from the front or back). Vacuum the condenser coils on the back or bottom to improve efficiency and prevent landlord complaints about appliance neglect.
- Clean the dishwasher. Run an empty cycle with a cup of white vinegar on the top rack to dissolve buildup. Wipe the door edges and gasket.
- Address the sink and faucet. Use baking soda to scrub stainless steel sinks, then polish with a dry cloth. For hard water spots on faucets, wrap them in vinegar-soaked paper towels for 30 minutes, then scrub.
- Wipe countertops, backsplash, and walls. Grease splatters migrate farther than expected. If walls need repainting due to stains, that’s a separate issue, cleaning alone won’t fix it.
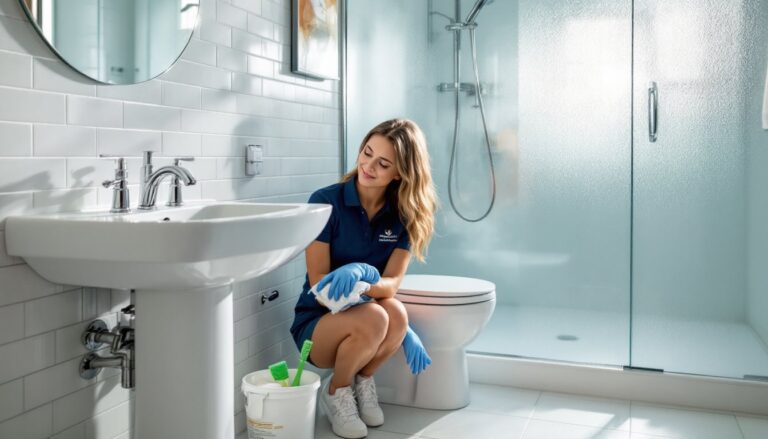
Bathroom Scrubbing and Sanitizing
Bathrooms require disinfecting, not just cosmetic cleaning. Mold, mildew, and mineral deposits are common problem areas.
- Scrub the toilet inside and out. Use a toilet bowl cleaner with hydrochloric acid for tough stains (follow label safety instructions). Wipe the exterior, base, and behind the tank. Don’t overlook the bolts at the base, grime hides there.
- Attack soap scum and hard water stains in the tub and shower. Spray surfaces with vinegar or a commercial soap scum remover. Let it dwell, then scrub with a stiff brush. For stubborn grout stains, make a paste of baking soda and hydrogen peroxide, apply it, and scrub with an old toothbrush.
- Clean the showerhead and faucet. Unscrew the showerhead and soak it in vinegar for an hour to dissolve mineral buildup. If it won’t unscrew, fill a plastic bag with vinegar, secure it over the head with a rubber band, and let it sit.
- Wipe down the vanity, sink, and mirror. Remove everything from the vanity, wipe shelves and drawers, then clean the sink basin and faucet. Use glass cleaner on mirrors, spray it on the cloth, not the mirror, to avoid drips behind the frame.
- Mop floors and baseboards. Bathroom floors collect hair, dust, and product residue. Vacuum first, then mop with disinfectant. Wipe baseboards with a damp cloth.
Living Areas, Bedrooms, and Halls:
- Dust ceiling fans, light fixtures, and vents with an extension pole and microfiber cloth.
- Wipe switch plates, door frames, and baseboards. Scuff marks on baseboards usually come off with a magic eraser or all-purpose cleaner.
- Vacuum carpets thoroughly, including edges and corners. For stains, spot-clean with a carpet cleaner or a mix of dish soap and water. Avoid over-wetting, it leads to mold.
- Mop hard floors. Sweep or vacuum first to avoid spreading grit.
- Clean windows inside and out (if accessible). Wipe sills and tracks with a damp cloth or vacuum attachment.
Miscellaneous Areas:
- Wipe the interior and exterior of closets.
- Clean air vents and return grilles (unscrew covers and wash them in soapy water).
- Dust blinds or wash curtains if they’re heavily soiled.
- Remove nails, picture hangers, and wall anchors. Fill holes with spackling compound, let it dry, then sand smooth. Touch up with matching paint if required by the lease.
Common Mistakes to Avoid During Move Out Cleaning
Even motivated tenants make errors that cost them deposit dollars.
Skipping the move-in inspection report. Without it, there’s no proof that the stained grout or chipped tile existed before occupancy. Always compare the unit’s current state to the original documentation.
Using the wrong cleaners on the wrong surfaces. Abrasive powders scratch glass cooktops and acrylic tubs. Bleach can discolor grout or damage colored fixtures. Ammonia-based cleaners leave streaks on stainless steel. Read product labels and test in hidden spots first.
Ignoring exterior areas. Patios, balconies, and garage spaces are part of the rental. Sweep them, remove cobwebs, and hose down surfaces if needed. Landlords notice.
Leaving cleaning supplies or trash behind. Even an empty bottle under the sink or a bag of rags in a closet can trigger complaints. The unit must be completely vacant.
Rushing the process. Deep cleaning a typical apartment takes 6–10 hours, depending on size and condition. Spreading the work over two days reduces fatigue and improves results. Many renters underestimate the time required for professional-level house cleaning tasks and scramble at the last minute.
Forgetting to document the work. Take photos or video of every room after cleaning. Time-stamped images provide evidence if disputes arise. Some tenants even invite the landlord to a pre-walk-through to address any concerns before the official inspection.
Neglecting light fixtures and ceiling fans. Dust-coated fan blades and bug-filled light globes are easy to miss but hard to ignore during inspections. Professionals recommend cleaning routines that include these often-overlooked areas, similar to standards followed for house cleaning jobs.
Overlooking odors. Cleaning removes visible dirt, but lingering smells from cooking, pets, or smoke can still cost deposits. Open windows during and after cleaning. Baking soda left in carpets overnight (then vacuumed) absorbs odors. For persistent smells, consider an ozone generator or hire a professional, though that’s a last resort.
Assuming “good enough” is enough. Landlords compare the unit to professional standards, not the tenant’s personal housekeeping habits. If unsure whether something is clean enough, keep scrubbing.
Conclusion
Move out deep cleaning is the final, and often most tedious, step in closing out a lease. But it’s also the most controllable factor in recovering a full security deposit. Tenants who approach the task methodically, use the right tools, and avoid common shortcuts walk away with their money intact and a clean break from the landlord. Start early, work systematically, and document everything. The effort pays off.